
To unhook a battery, first ensure the car is turned off. Then, locate the negative (-) terminal, loosen the nut or bolt securing the cable, and carefully lift the cable off the terminal.
Changing a car battery can be necessary for various reasons, such as when it is no longer holding a charge or needs replacement due to age. Despite the complexity of car systems, unhooking a battery is a simple task that can be easily accomplished by following a few steps.
This article will guide you through the process, providing you with a clear understanding of how to unhook a battery safely and efficiently. By following these instructions, you can confidently complete this task without any prior technical knowledge or assistance from a professional. So, let’s get started by learning the step-by-step process of unhooking a car battery.
Credit: medium.com
The Importance Of Unhooking A Battery
To unhook a battery, it’s important to follow proper safety precautions. Start by switching off the vehicle and wearing protective gear. Then, disconnect the negative terminal first, followed by the positive terminal. Finally, carefully remove the battery from its housing to avoid any accidents.
Prevent Electrical Shocks
Avoid Damage To Components
Before attempting any maintenance or repair work on your vehicle, it is crucial to understand the importance of unhooking the battery. Unhooking the battery is a standard procedure that ensures your safety as well as the protection of your vehicle’s valuable components. This article will explore two key reasons why unhooking the battery is essential: to prevent electrical shocks and to avoid damage to components.
Prevent Electrical Shocks
Unhooking the battery is the first step to prevent electrical shocks. When the battery is connected, it constantly supplies power to various electrical components in your vehicle. Touching the wrong wire or connection without disconnecting the battery can result in a potentially dangerous electrical shock. By unhooking the battery, you eliminate the risk of accidentally coming into contact with live electrical parts.
Let’s consider an example. Imagine you need to replace a faulty alternator. By unhooking the battery prior to starting any work, you eliminate the possibility of a sudden surge of electricity when disconnecting the alternator’s wiring. This simple step ensures your safety and provides a peace of mind knowing that you won’t experience any painful shocks.
Avoid Damage To Components
Another vital reason for unhooking the battery is to avoid damage to your vehicle’s components. Many modern vehicles have complex electronic systems that are constantly powered by the battery, even when the ignition is off. Performing tasks that involve the electrical system, such as replacing a fuse or installing a new stereo, without unhooking the battery can inadvertently cause damage to sensitive components.
For instance, if you were to replace a fuse without disconnecting the battery, there is a risk of a power surge that could damage other electrical parts. By unhooking the battery, you ensure that all power is cut off and no accidental power surges occur during your maintenance or repair work. This simple step can save you the hassle and expense of repairing or replacing damaged components.
In conclusion, unhooking the battery is crucial for both your safety and the well-being of your vehicle. By taking the time to disconnect the battery before working on your vehicle, you can prevent electrical shocks and avoid unintentional damage to vital components. Remember, safety should always be your top priority when it comes to any vehicle maintenance or repair tasks.

Credit: www.ebay.com
Safety Precautions
Learn the essential safety precautions for unhooking a battery. Follow these 6 guidelines to ensure a safe and secure process. Keep yourself protected and avoid any mishaps when handling a battery.
Gathering Necessary Tools
Before you begin unhooking a battery, it’s important to gather all the necessary tools to ensure a smooth and hassle-free process. Having the right tools on hand will not only help prevent potential damages but also make the task much easier. Here are the essential tools you’ll need:
| Tools | Purpose |
|---|---|
| Wrench or socket set | To loosen and remove the battery terminals |
| Battery terminal puller | To safely and easily disconnect the battery terminals |
| Battery cleaning brush | To remove any corrosion on the terminals and ensure a good connection |
Wearing Protective Gear
Prioritizing your safety is crucial when handling batteries. Remember, a car battery contains harmful chemicals and produces explosive gases, so it’s important to protect yourself. To stay safe while unhooking a battery, make sure to wear the following protective gear:
- Safety goggles: To shield your eyes from any potential splashes of battery acid.
- Chemical-resistant gloves: To protect your hands from any harmful chemicals or acid contact.
- Clothing covering: Wear long-sleeved shirts and pants to minimize exposure to the battery and any accidental spills.
By wearing the appropriate protective gear, you are minimizing the risk of injury or harm during the battery unhooking process.
Step-by-step Guide To Unhooking A Battery
Unhooking a car battery is a straightforward process that is essential for tasks like maintenance, replacement, or troubleshooting. In this guide, we’ll walk you through the step-by-step process of unhooking a battery, ensuring you can do it safely and effectively. From locating the battery to disconnecting the cables and removing the battery, we’ll cover each step in detail.
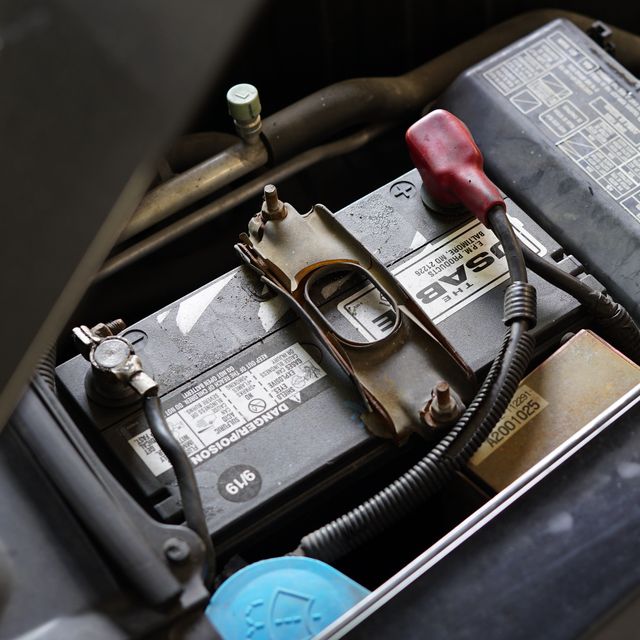
Locating The Battery
Before starting the unhooking process, you need to locate the position of the battery in your vehicle. The location may vary depending on the make and model of your car, so consult your owner’s manual for guidance. In most cases, the battery can be found under the hood.
Disconnecting The Cables
Once you’ve located the battery, the next step is to disconnect the cables. First, identify the negative and positive terminals. Make sure to wear safety gloves to avoid any potential electrical shocks. Start by loosening the nut on the negative terminal and carefully remove the cable. Repeat the same process for the positive terminal. Remember to keep the cables away from each other to prevent accidental reconnection.
Removing The Battery
With the cables now detached, you can proceed to remove the battery from its housing. Use a wrench or socket to loosen the battery hold-down clamp. Carefully lift the battery out of place, ensuring not to strain yourself if it’s heavy. Take caution as batteries are heavy and contain hazardous materials, so handle with care.
Troubleshooting And Tips
When it comes to unhooking a battery, you may face some challenges. Here are some troubleshooting tips to help you deal with common issues that may arise while disconnecting a battery.
Dealing With Stuck Connectors
Stuck connectors can be frustrating to deal with. If a connector is stuck, gently rock it back and forth to loosen it. You can also use a pair of pliers to carefully twist and pull the connector until it comes off.
Handling Corrosion
Corrosion on battery terminals can impede the removal process. To handle corrosion, create a solution of baking soda and water and use a wire brush to clean the terminals. Once clean, apply a thin layer of dielectric grease to prevent future corrosion.
Aftercare And Reinstallation
After removing the battery, begin by cleaning the terminals thoroughly.
- Use a mixture of baking soda and water to clean off any corrosion on the terminals.
- Scrub gently with a wire brush to ensure a clean connection.
- Wipe off any remaining residue with a clean cloth.
Now it’s time to reinstall the battery properly to ensure optimal performance.
- Double-check the battery placement in the correct position.
- Tighten the battery terminals securely, but avoid over-tightening.
- Apply a thin layer of dielectric grease to the terminals for added protection.
Credit: www.roadandtrack.com
Frequently Asked Questions On How To Unhook A Battery
Which Battery Terminal Do You Disconnect First?
Disconnect the negative (-) battery terminal first.
What Happens If You Disconnect The Positive Terminal First?
Disconnecting the positive terminal first can prevent accidental short-circuiting and electrical hazards. This minimizes the risk of sparks and damage to the electrical system. Always follow safety precautions when working with car batteries.
Do You Hook Up Red Or Black First?
Connect the red cable first, then attach the black cable when hooking up.
Why Do You Disconnect The Negative On A Battery?
Disconnecting the negative battery terminal first prevents accidental short circuits and electrical hazards during maintenance.
Conclusion
In summation, unhooking a battery is a simple task that requires caution and care. Following the steps and safety measures mentioned in this guide will ensure a smooth and hassle-free process. By taking the necessary precautions, you can successfully unhook a battery and conduct any needed maintenance or repairs.