To replace a battery terminal, use a wrench to loosen the nut on the terminal clamp, then remove the old terminal and replace it with a new one. This helps restore a secure connection for your car battery.
Car batteries play a crucial role in the proper functioning of your vehicle. Over time, battery terminals can become corroded or damaged, leading to poor electrical connectivity. If you notice corrosion or damage on your battery terminals, it is essential to replace them promptly to ensure the continued reliability of your car’s electrical system.
In this guide, we will provide simple step-by-step instructions on how to replace a battery terminal, allowing you to maintain the health and functionality of your vehicle’s battery. Following these instructions will help you complete the replacement process efficiently and effectively, ensuring your car’s battery operates optimally.
Tools And Materials Needed
Tools and Materials Needed:
Replacing a battery terminal is a relatively simple task that requires a few tools and materials. Before you start, gather the following:
Safety Gear
- Protective gloves
- Safety glasses
Replacement Battery Terminal Kit
A battery terminal kit typically includes:
- Battery terminal clamps
- Shims or washers (if needed)
- Battery cable cleaner
- Wire brush
- Adjustable wrench
- Pliers
- Wire cutters/strippers
These tools and materials are essential in replacing a battery terminal safely and efficiently. Ensuring that you have everything ready before you begin will make the process smoother and more convenient.
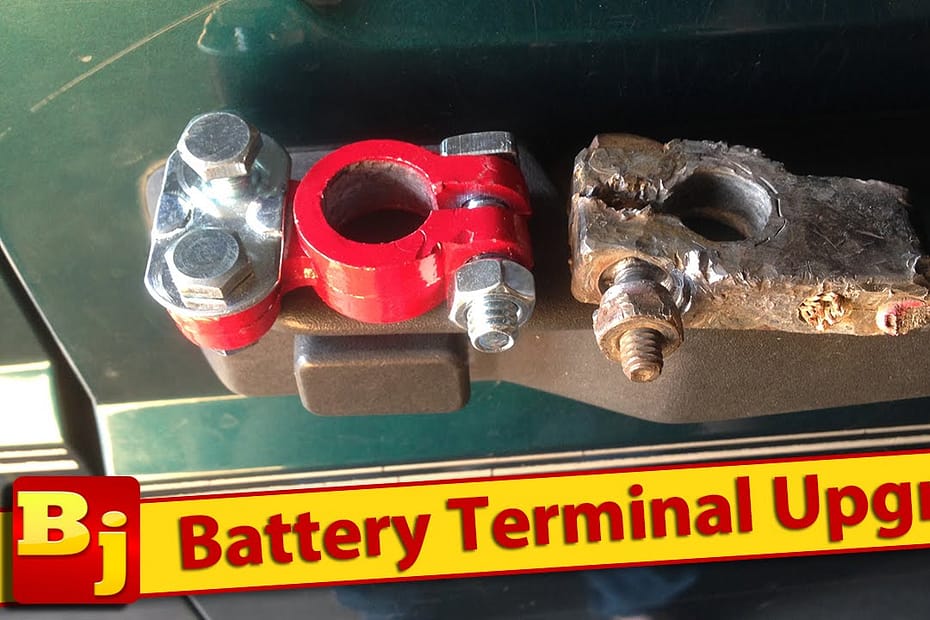
Credit: www.ifixit.com
Step-by-step Guide
When it comes to replacing a battery terminal, it’s crucial to ensure a safe and seamless process. Following a step-by-step guide will help you replace the terminal efficiently without any mishaps.
Step 1: Safety First
- Ensure the vehicle is parked in a well-ventilated area.
- Wear protective gloves and safety goggles to prevent any accidents.
- Make sure all electronic devices in the vehicle are turned off.
Step 2: Disconnect The Battery
Start by disconnecting the negative terminal of the battery using an appropriate wrench. Always ensure you’re working on the negative terminal to avoid any electrical shock.
Step 3: Remove The Old Terminal
- Inspect the old terminal for any signs of corrosion or wear.
- Use a terminal puller or a wrench to loosen and remove the old terminal from the battery post.
- Clean the battery post and terminal cable end with a wire brush to ensure a good connection.
Step 4: Install The New Terminal
Attach the new terminal to the cable end and tighten it securely onto the battery post using the appropriate tool.
Step 5: Reconnect The Battery
- Reconnect the negative terminal first and then the positive terminal.
- Ensure each connection is secure and tight to avoid any electrical issues.
- Once the battery is connected, start the vehicle to verify the terminal replacement was successful.
Testing The Connection
Testing the connection is a critical step in replacing a battery terminal. It ensures that the new connection is secure and reliable, reducing the risk of electrical malfunction or failure. This step involves a series of checks and measurements to confirm that the terminal is properly installed and functioning as intended.
Test The Connection With A Multimeter
Using a multimeter is an effective way to test the continuity and integrity of the connection. Set the multimeter to the resistance or continuity mode and place the probes on the terminal and the cable end. A low-resistance reading indicates a good connection, while a high reading suggests a poor or faulty connection that requires further attention.
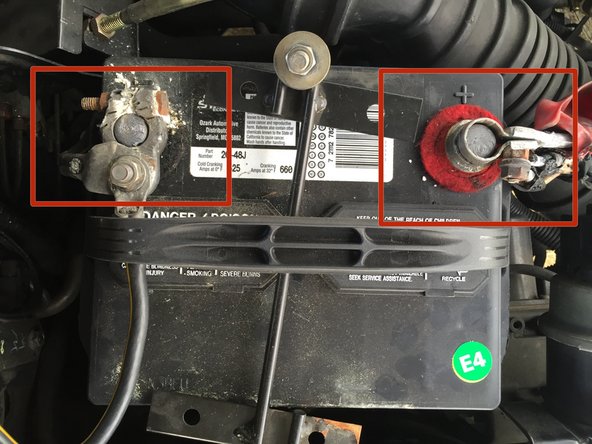
Checking For Proper Fit And Tightness
Ensuring the battery terminal fits snugly and tightly onto the battery post is crucial for optimal electrical conductivity. Check for any looseness or play in the terminal and tighten it accordingly. Ensure that the terminal clamps securely onto the battery post without any excessive movement, which could lead to electrical instability or arcing.

Credit: www.terminalmart.com
Maintenance Tips
Learn the essential maintenance tips for replacing a battery terminal. Ensure a smooth process with step-by-step instructions and safety precautions. Keep your vehicle running smoothly with this easy DIY fix.
Cleaning And Protecting The Terminals
Regularly cleaning and protecting the battery terminals is essential for maintaining a healthy battery. Over time, a buildup of corrosion can interfere with the connection between the terminals and the battery, leading to poor electrical flow and potential starting issues. To clean the terminals, start by disconnecting the negative cable (commonly labeled with a “-” symbol) followed by the positive cable (labeled with a “+” symbol). Using a wire brush or battery terminal cleaner, gently scrub away any corrosion or dirt that has accumulated on the terminals. Once the terminals are clean, it’s important to protect them from future corrosion. Apply a thin layer of petroleum jelly or a specialized terminal protection spray onto the terminals and reconnect the positive cable first, followed by the negative cable. This will help prevent future corrosion and ensure a strong, reliable connection.
Regular Inspection And Tightening
Regularly inspecting and tightening the battery terminals is an important maintenance practice that can help prevent loose or damaged connections. Over time, the constant vibrations and movements experienced by the vehicle can cause the battery terminals to become loose. To inspect the terminals, start by visually checking for any signs of corrosion, loose connections, or damaged cables. If corrosion or other issues are present, follow the cleaning and protecting steps mentioned above. To ensure a secure connection, use a wrench or pliers to gently tighten the terminal bolts. Be careful not to overtighten, as this can damage the terminal or strip the threads. If the terminal bolts are excessively loose or damaged, it may be necessary to replace the terminal or seek professional assistance. Regularly inspecting and tightening the battery terminals will help maintain a strong electrical connection and prolong the life of your battery.
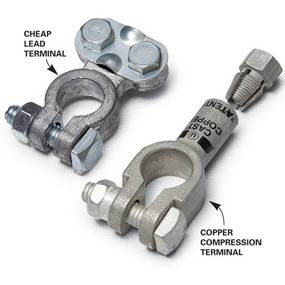
Credit: www.familyhandyman.com
Frequently Asked Questions On How To Replace A Battery Terminal
How Much Does It Cost To Replace A Battery Terminal?
Replacing a battery terminal typically costs between $5 to $50 depending on the car model and labor fees.
What Tool Do You Need To Change A Battery Terminal?
To change a battery terminal, you’ll need a wrench or a socket set.
Can You Fix A Broken Battery Terminal?
Yes, a broken battery terminal can be fixed by replacing it with a new one. It’s important to ensure the replacement is compatible with your vehicle’s make and model. If you’re unsure, it’s best to consult a professional mechanic for assistance.
Regular maintenance can help prevent terminal issues in the future.
How Long Does A Battery Terminal Replacement Take?
Battery terminal replacement typically takes about 30 minutes to an hour. The duration can vary based on the vehicle model and any additional issues that may arise during the process.
Conclusion
To sum it up, replacing a battery terminal is a relatively simple process that can save you time and money. By following the step-by-step instructions in this guide, you can ensure a successful replacement. Remember to prioritize safety, use the right tools, and take your time.
Whether you’re a seasoned DIYer or a first-time car owner, mastering this skill will come in handy. So, don’t hesitate to give it a try and empower yourself with the knowledge to fix your own vehicle.